- March 26, 2023
- Posted by: Forex Wiki Team
- Category: Forex Trading System
No Indicator Daily/Scalper Trading Strategy
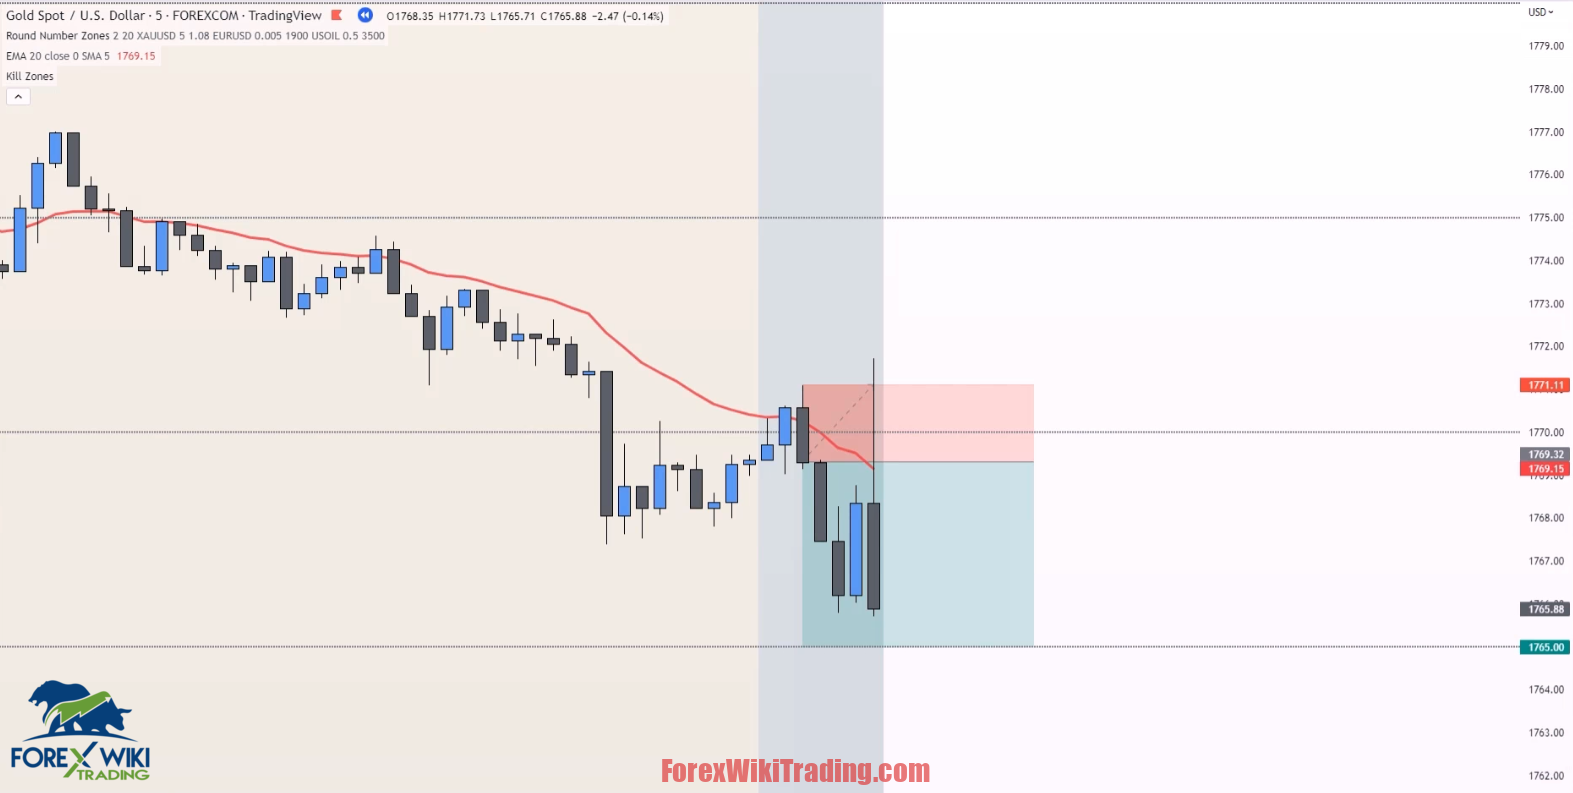
In this article, I describe a trading strategy for the symbol XAUUSD in the 5M timeframe. I backtested it with 100 trades using the software Tradingview1 and MSTM Excel2, the chart is XAUUSD from the broker Forex.com. An MS Excel workbook is attached that contains the full data for the backtest which includes Date, Time, Entry, Stop-Loss, Take-Profit, Risk/Reward, and Profit for each theoretical trade based on historical data.
The initial balance and the risk per trade can be defined in the MS Excel Sheet, the default values I used are 1% risk of the current account balance per trade and the initial balance I set to 10.000 $. According to the backtest, the strategy has a win rate of 86 %, the gain was 507 % which led to a profit of 50.763,59 $.
Best Brokers List
The No Indicator Daily/Scalper Trading Strategy works with any broker and any type of account, but we recommend our clients use one of the top forex brokers listed below:
Rules
In this chapter, the rules I used for taking the trades are described.
Trading times
Trades are executed during the London and New York session. The times are (NY time)
London Session: 03:00 – 12:00 (preferred time)
New York Session: 08:00 – 17:00
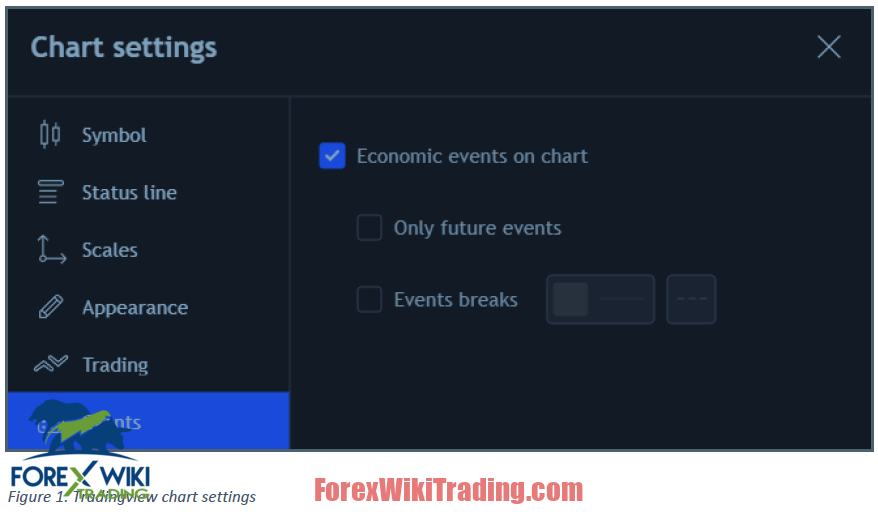
When there is News no trades may be executed! You can see the breaking News for example on the website https://www.forexfactory.com/news and you can display them in Tradingview when Economic Events are enabled in the Chart settings:
Timeframe
The trading timeframe is 5 minutes. For finding levels of support or resistance, higher timeframes can be used, but it is not necessary if the levels are clear to see on the current timeframe. I will explain later by examples how the levels can be identified.
Indicators
I use 3 free Tradingview indicators for this strategy.
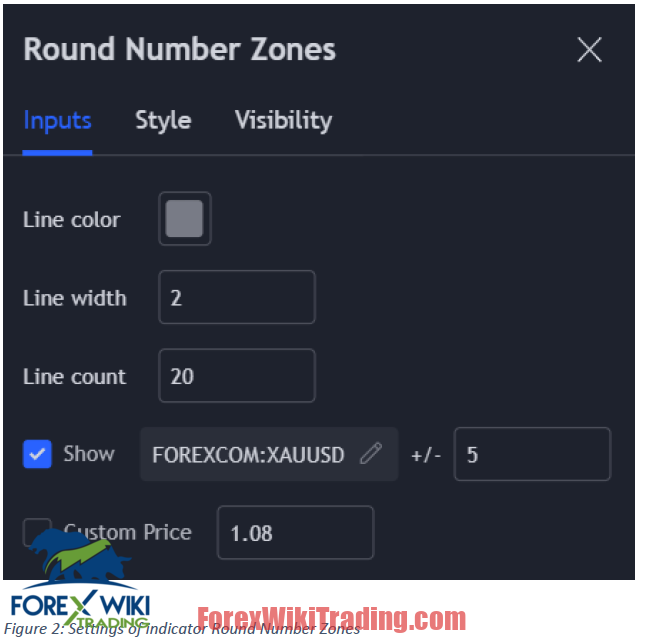
Round Number Zones: This indicator is written by me, you can display lines in the chart for round numbers of the price
In the settings of the indicator add your Gold Symbol and set the distance to 5 like that:
After that, lines are displayed in the chart for round 5$ price levels above and below the current price.
Kill Zones: This one is used to visualize the London and New York Killzone. I use the default settings.
20 EMA (Exponential Moving Average): The indicator is optional, I use it as confirmation of entries when the price for example bounces off from it.
Patterns
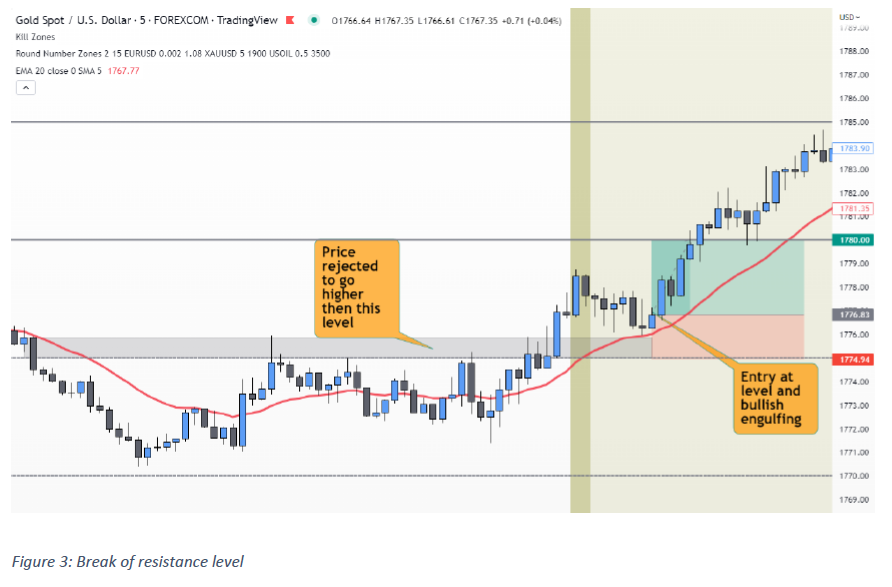
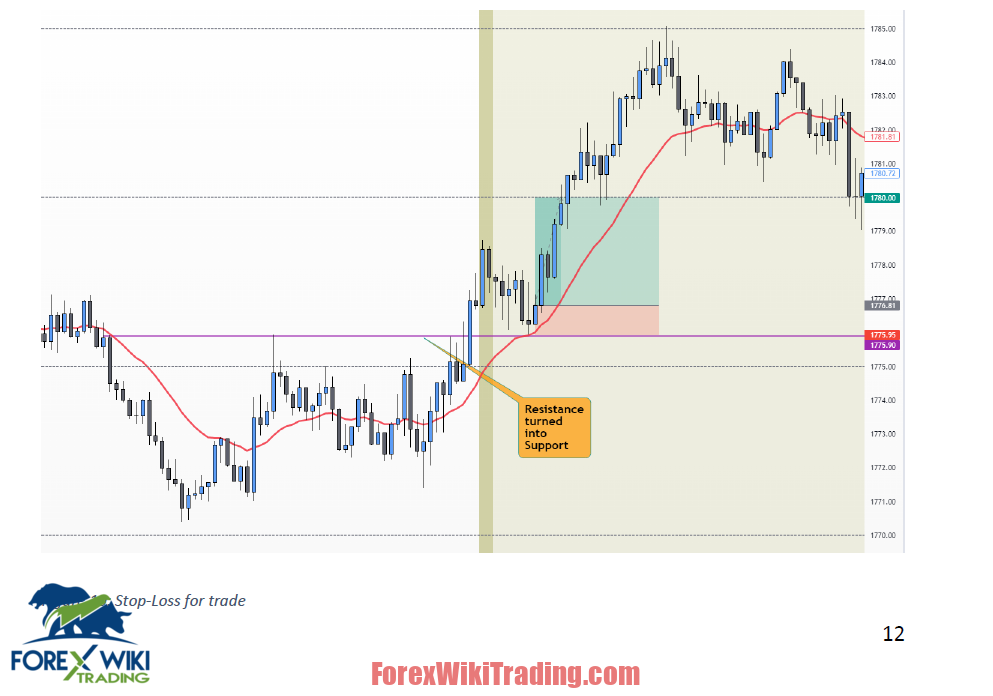
During the trading times of the strategy, I search for a break of support or resistance levels that are near a round number zone (e.g. 1775.00 or 1810). The break has to be obvious and strong, which means that the price has to close above the level by a leg that contains candles with large bodies.
When the price comes back to the support or resistance level I search for a candlestick pattern that indicates a rejection of the level or a continuation in the direction of the leg that broke the level.
The closing price of the candle that forms this pattern must respect the level and the round number zone near the level, this means that it closes above the level in case of a buy trade and below the level in case of a sell trade.
Swing-Failures
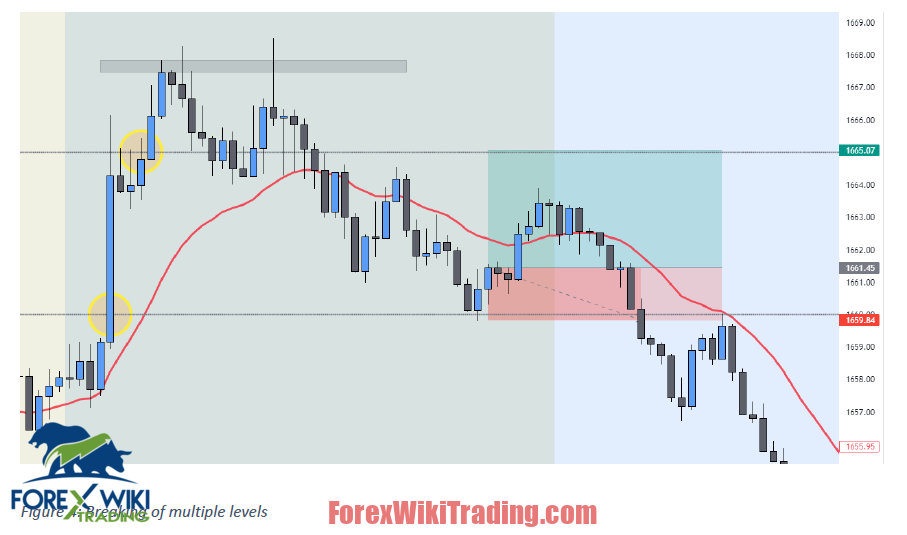
When the breaking move is very strong and the price doesn’t return to the broken level, but breaks a second level, it can be a sign of exhaustion.
In this setup, we can see a strong move to the upside breaking two round number levels. Then the price returns to the second level go up again and refuse to close above the previous high but leave a large wick instead.
This is a swing failure pattern, indicating exhaustion and a potential reversal.
In this case, I avoid taking an entry when the price comes back to the first broken level because we a bearish market structure is already established.
A video about the swing failure pattern can be seen here: https://youtu.be/cTw4HL1XYHA
The direction of the break
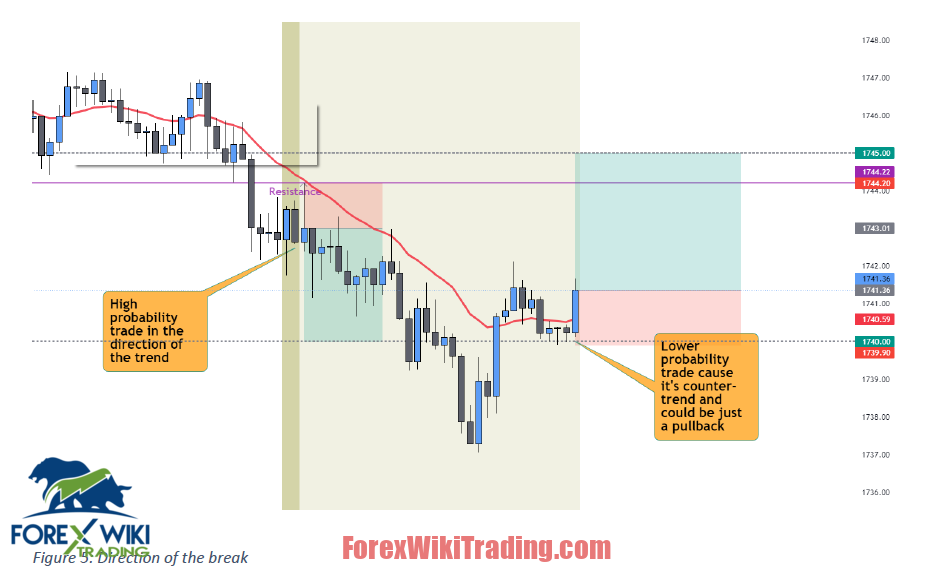
Do I trade every strong break of a level? No, because the break that goes in the direction of the trend or is a breakout with a pullback to the broken level has a higher probability to be successful.
The first trade in the example above returns to the resistance level that was supported before. It forms a nice rejection directly at this level, so it has a high chance to continue to the round number level below.
The second entry would be taken as well after a break of a round number level at a bullish engulfing pattern, but it is against the direction of the newly formed trend. Beside of that no strong level of resistance can be seen at this time for this level.
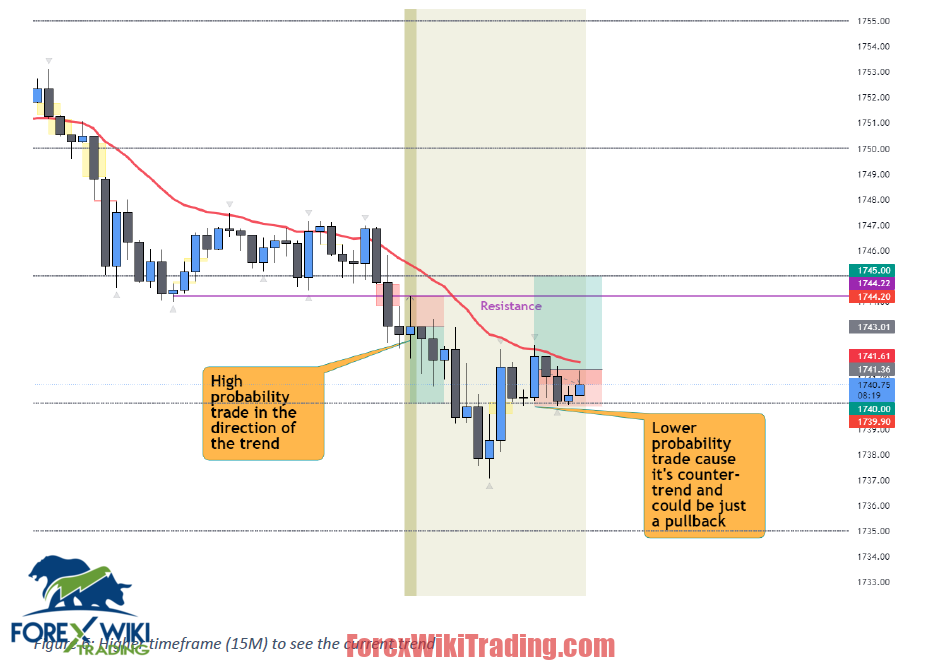
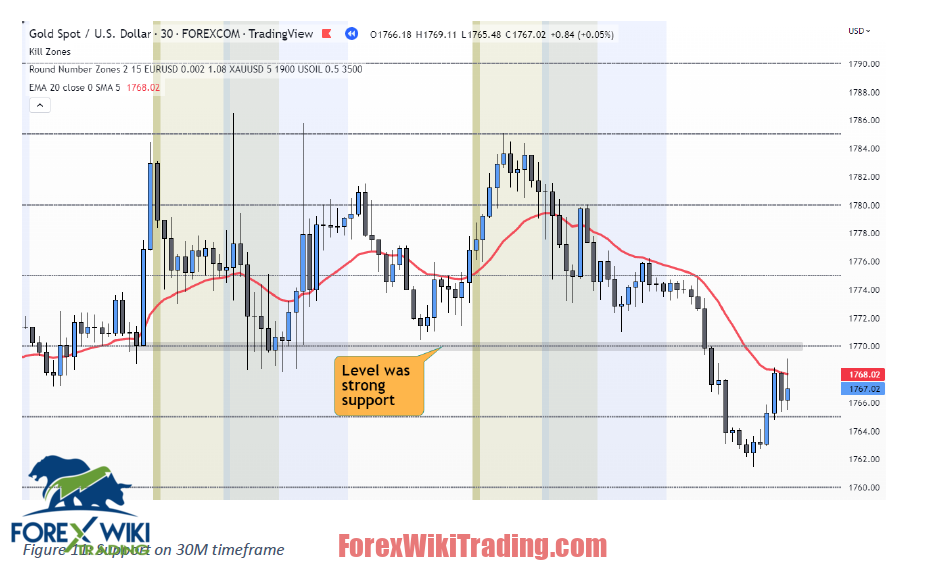
To see the overall direction more clearly, I like to switch to a higher timeframe, like the 15M or 30M.
On this timeframe we can see that we are in a downtrend and a bullish trade would be against it – which doesn’t mean that the trade can’t be successful, it's just less likely compared to the first trade.
If it isn’t an overall bullish trend, I want at least to see a break of structure to the upside on this timeframe at this point, before I consider going long.
Entry
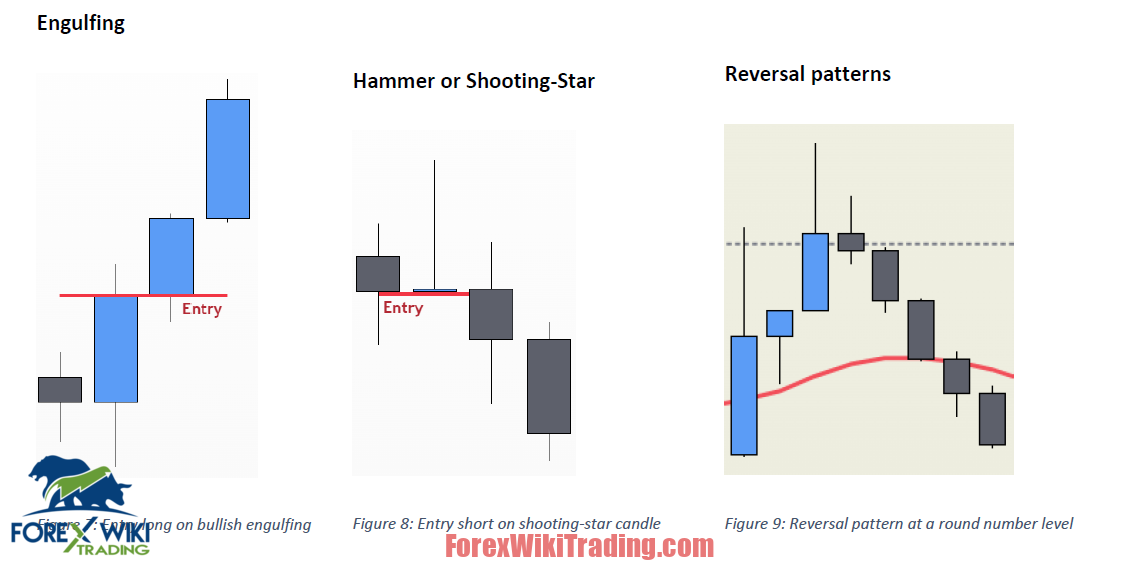
When the price comes back to a level of support or resistance that was broken, I want to see one of these candle stick patterns, for which the last candle has to close above/below the level and the round number.
Stop-Loss
Example of a buy: I look to the left and try to identify the lowest low (wick) of the pullback after the break of the level:
Take-Profit
The level for taking profit is always the next round number. When going long it is the next higher level, when going short it is the next lower level. Sometimes the closing price is exactly at these levels, so to be sure that the take-profit is hit, a few points from the take-profit level could be added or removed. (it also depends on spreads/broker)
Risk
It is a compounding strategy, which means the risk for every trade is 1% of the current account size.
Also keep in mind that for all the levels the spread of your broker must be considered, so you have to add this to the price.
Higher timeframe confluence
I like to make use of higher timeframes (in this strategy 15M or 30M) to check whether the level to that price comes back to act as previous support or resistance.
Such a level has higher relevance than a level of lower timeframes, especially when it is at a round number zone.
Finding this confluence is an optional element of the strategy, I only use it when the support or resistance is not clear to see on the lower timeframe.
Another possibility to make use of higher timeframes is to spot candlestick patterns on these timeframes (e.g. 10 or 15M) that are not clear to see on lower timeframes (5M).
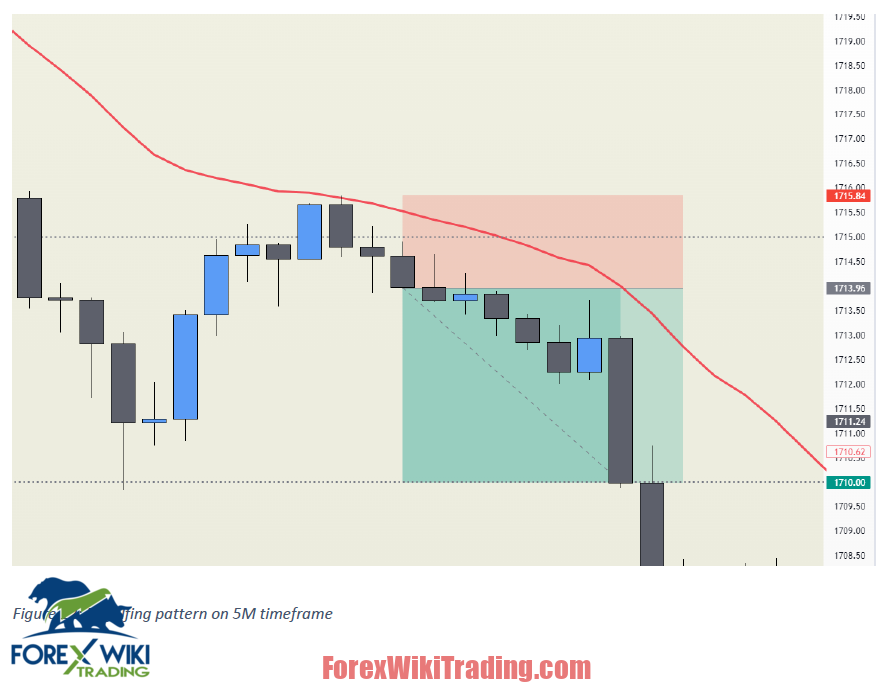
For this trade for example the bearish engulfing can’t be seen in the 5M timeframe:
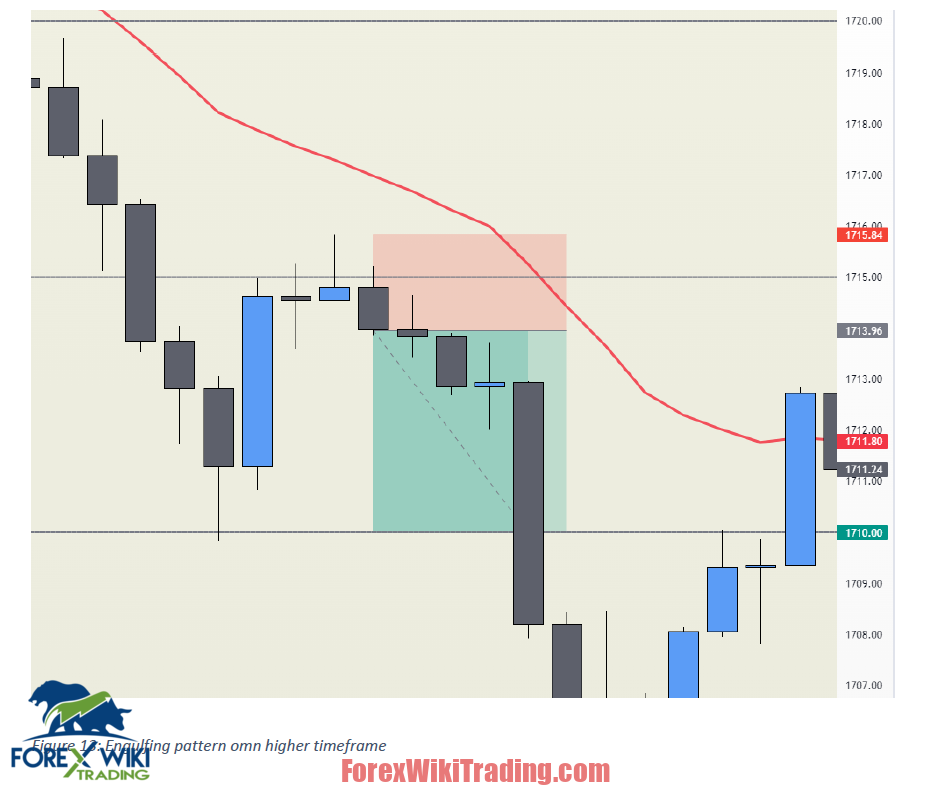
But when we go to a higher timeframe like the 10M it can be identified clearly:
So it is possible with deep knowledge and a lot of experience with candlestick patterns to recognize them even on lower timeframes, but I like to switch the timeframes when the price is closing at 10M or 15M markers to see if we have a candlestick pattern at this point that I can use as an entry.
Video: Higher timeframe candlestick patterns
Trending confluence
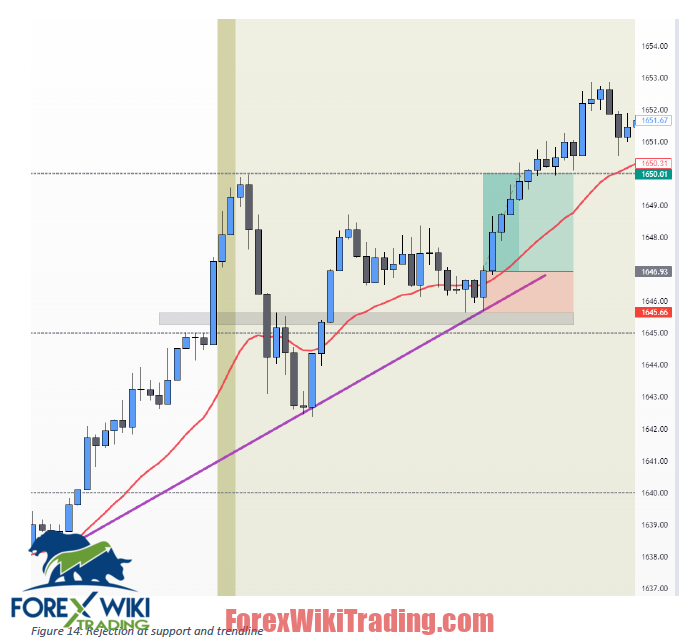
When the price rejects a support or resistance level with one of the candlestick patterns that are used for entries, it can be a good confluence when it rejects a trendline as well like in this setup:
This confirmation is not necessary to take the trade, but it is an additional indication that the price is respecting this level.
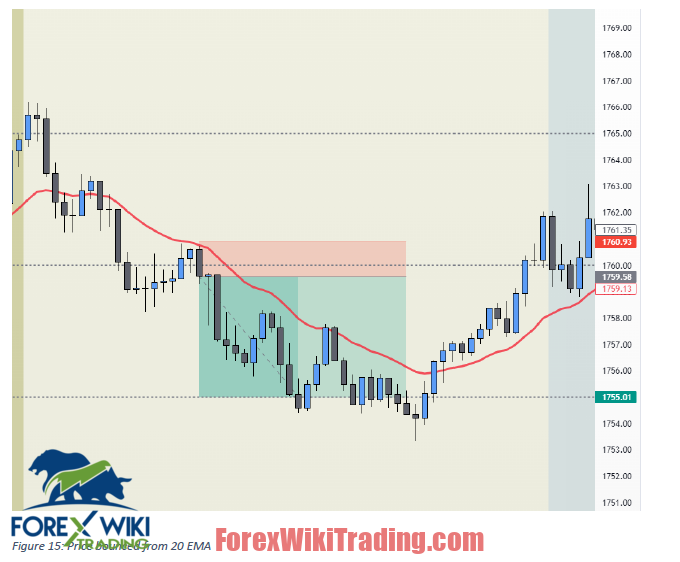
EMA confluence
When an entry can be found, like the bearish engulfing in the example below, that closes below the broken level 1760, we can sometimes see that price bounces from the 20 EMA as well.
This confirmation is optional, it just gives an additional indication that the price will continue to go down.
Optimizations
In this chapter I like to mention some extensions to the strategy that can be considered for your own backtest, they are not included in the backtest I made.
Take-Profit
The take-profit in this strategy has to be set at round number levels. Sometimes these levels are hit very exactly or price rejects before really reaching the level. To increase the win rate it could be a good idea to define the take-profit a bit lower or higher (like 0.20 $) than the round number.
Partials
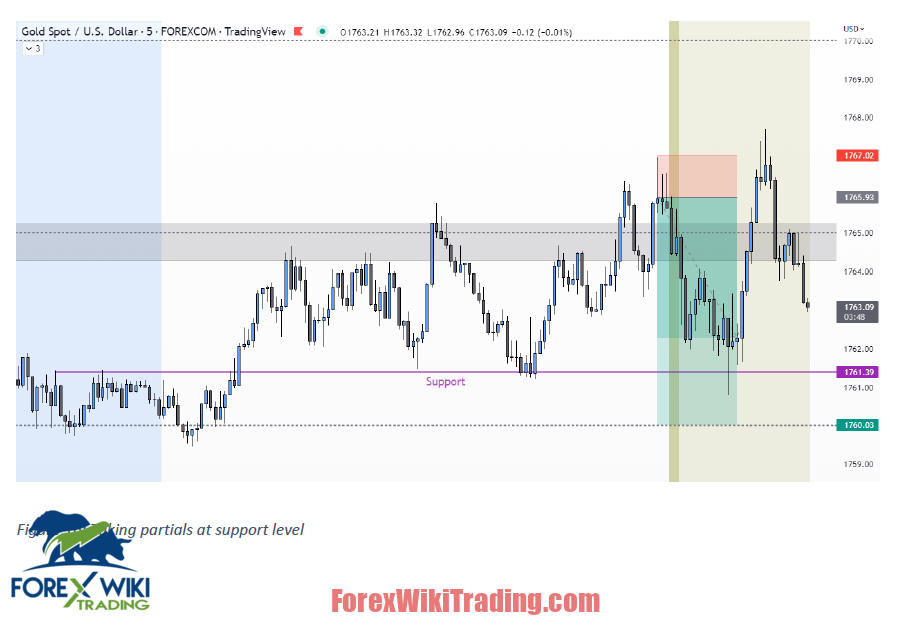
When there is an obvious level of support or resistance before the price reaches the round number level that is defined as take-profit, partials can be taken at this point to secure e.g. 80% of the profit. I didn’t include this method in the backtest, but I noticed that it would have increased the win rate even more. Of course, it would reduce the risk-to-reward ratio of winning trades when adding this technique to the strategy.
Stop-Orders
Sometimes an entry pattern appears at the round number level but the price doesn’t close above/below it to let the entry be valid.
In this case a stop order could be placed that is executed above the high (in case of buying) of the last candle.
Summary
- Find a level of Support or Resistance near a 5$ round number zone.
- Optional: Check the relevance of the level on a higher timeframe.
- Check the direction of the trend on a higher timeframe (e.g. 15M).
- Wait for the price to come back to the level.
- Entry when price action is shown on the close of a candle (5M timeframe) above (buy) or below (sell) the support/resistance and the round number level.
- Stop-Loss to lowest low (buy) or highest high (sell) of the pullback leg.
- Take-profit at the next round number level above (buy) or below (sell) price.
No Indicator Daily/Scalper Trading Strategy Free Download
We highly recommend trying the No Indicator Daily/Scalper Trading Strategy with ICMarket demo account. Also, familiarize yourself with and understand how this system works before using it on a live account.


